Save $30 when you spend $150 or more on Supplies.


Discover inspiring projects to create with your Brother machine. From cutting and crafting to sewing, embroidery, quilting, labelling and more, find new ways to bring your ideas to life.
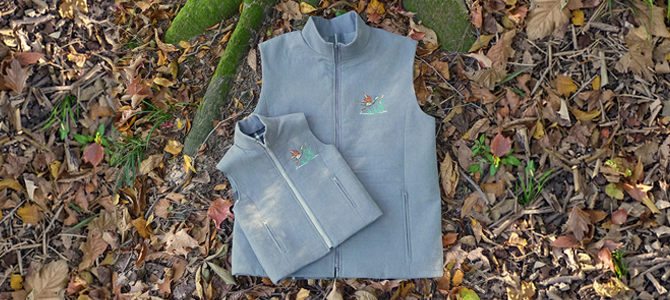
Make a zip-pocket quilted vest with our easy zipper hacks and your Brother machine.
Supplies & Tools
• Brother Sewing Machine or Brother Sewing and Embroidery Machine if adding embroidery
• Brother SA107 Walking Foot or Brother SA209 Compact Dual Feed Foot for quilting the vest. One of these feet may be included with your Brother machine
• Brother SA161 Adjustable Zipper Foot
• Vest pattern with zippered pockets in front seams
• Fabric and basic sewing notions as indicated on the pattern envelope, including zippers (listed below), appropriate machine needle and sewing thread for construction. See pattern shown below.
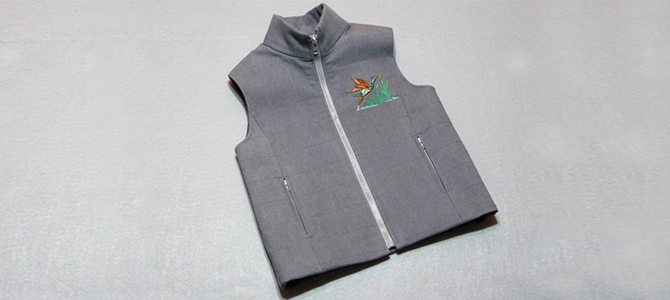
Note: The featured vest is sewn in a boys’ size, but the same general guidelines can be used for a men’s size. We used lightweight grey denim, quilted with thin fleece and lined with flannel shirting fabric. For the pocket technique presented here, you’ll need to cut the four pocket pieces using lining-weight fabric. Purchase zippers as described below.
• For zippered front pockets, purchase two standard polyester coil zippers to match the jacket fabric; zippers should measure at least 2-inches longer than the pattern requires. Two 7-inch zippers were used in this example.
Note: A separating zipper is needed for the centre front. The sample vest features a synthetic separating sport style zipper. If you can’t find the precise length, you can purchase a longer zipper and shorten it from the top edge. There are several methods for doing this. Use your favourite method or follow the tips presented at the end of these instructions.
The zipper foot featured in these instructions is the Brother SA161 Adjustable Zipper Foot.
• To use the left side of the foot, set the needle position to zero.
• To use the right side of the foot, set the needle position to 7.0.
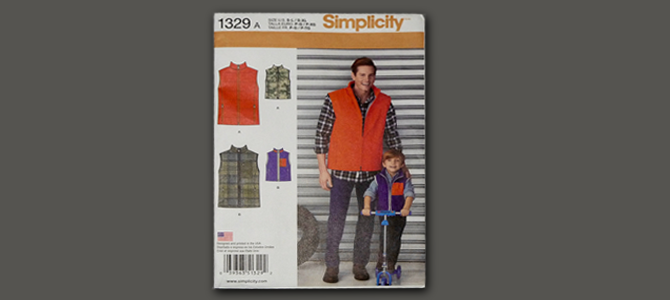
This vest is based on the pattern shown here. Before you get started, take a few minutes to read through these instructions so you’re familiar with the steps ahead. For general cutting and sewing instructions, refer to the pattern. For the zippered front pockets, follow the pattern hack provided here. The pocket construction is straightforward when you work through it step by step, using the instructions and photos as a guide. Once you’ve mastered this technique, you may want to use it on other patterns with pockets inserted into front seams. It’s a handy skill to have in your sewing toolbox!
Vest pattern used for this project: Simplicity 1329 View A
Featured pattern is a product of Simplicity Pattern Company Inc. Brother International Corporation makes no representations or warranties regarding such products.
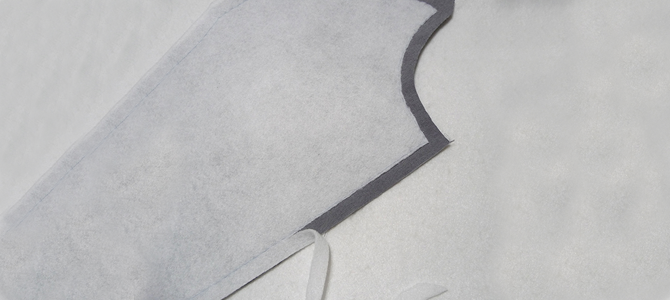
Cut the main pattern pieces from the fabric, thin fleece, and lining. To get ready for quilting, layer a piece of fleece against the wrong side of each vest piece and baste the layers together following the pattern instructions. This will help keep everything nicely in place as you sew.
Tip: After basting, trim the excess fleece away from the seam allowance to eliminate bulk and make sewing and pressing seams easier.
You can quilt the pieces as you go, following the pattern instructions, or quilt all the pieces at the beginning, as shown in these instructions, removing basting stitches when quilting is complete.
Tips for quilting: Set the straight stitch length to 3.5 and quilt by stitching horizontal lines across each piece. It’s important that each parallel line matches corresponding pattern pieces. For evenly spaced lines, mark the first line using low-tack tape and then use a quilting guide for the remaining lines. Here, the lines are spaced 1½-inches apart. See the images below for quilting with the Dual Feed Foot, MuVit™ and the Dual Feed Quilting Guide set. This set includes a guide for both the left and right sides of the foot.
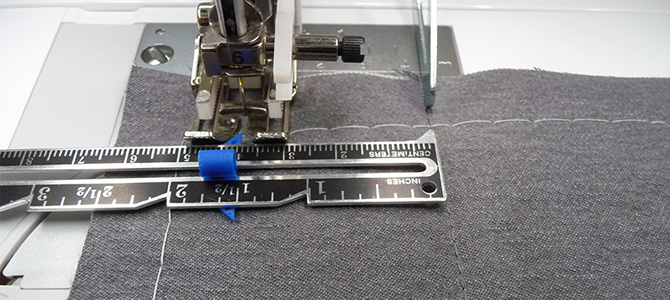
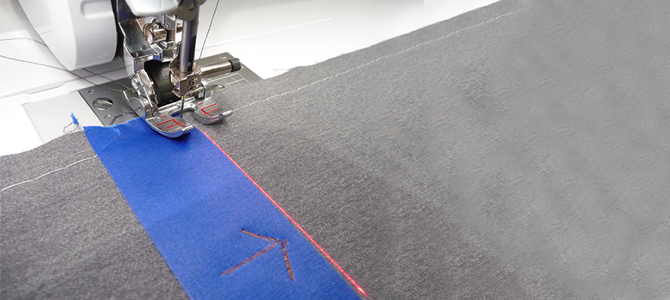
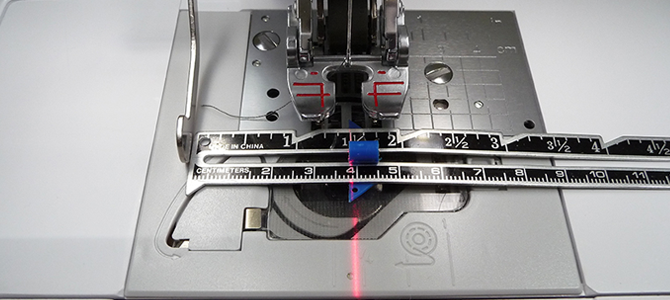
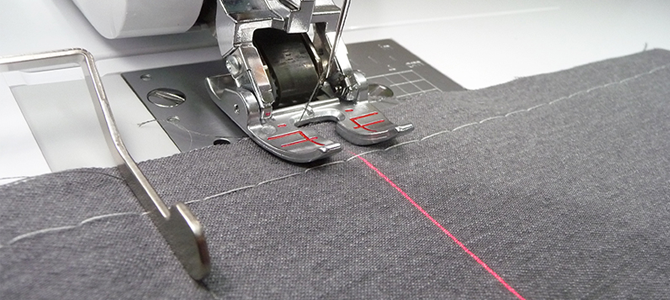
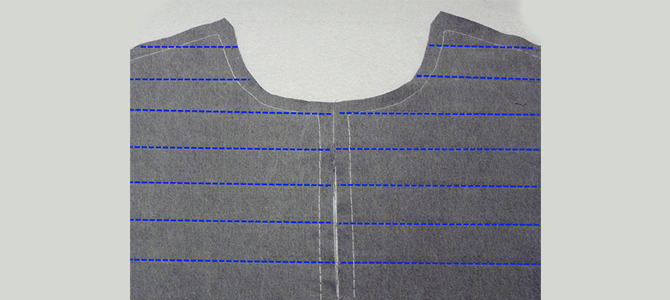
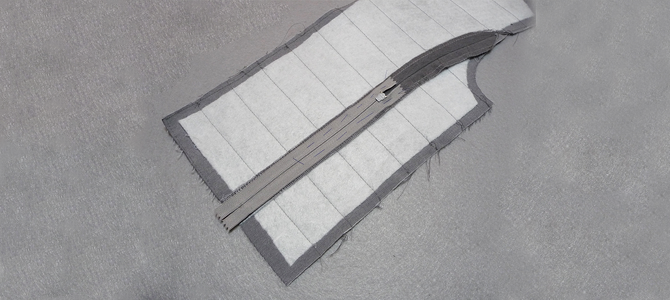
Here is an example of quilted front pieces shown with enhanced blue lines.
Tip: Even though the vest is lined, it’s a good idea to clean finish raw edges of major seams with a serger, zigzag, or overcasting stitch before continuing. This makes it easier to handle pieces during construction.
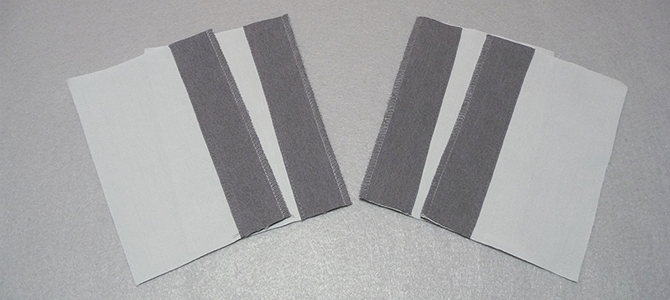
Now it’s time to prepare for sewing the zippered pockets using a method that is different from the original pattern instructions. This is commonly known as a "pattern hack." If you follow along step by step, using the photos as a guide, you’ll find this pocket style is not difficult to sew and results in a nice, neat finish. For this method, each pocket requires two pieces cut from lining fabric to eliminate bulk. To keep lining from showing when the pocket is zipped open, cut four strips of vest fabric, having each strip measure 2-inches wide times the length of the pocket piece. Turn and press under ¼-inch along one long edge of each strip. Place a strip on each pocket lining piece with raw edges even. Attach to each pocket lining using a straight stitch along the folded edge. It’s important to clean finish the opposite raw edge of the strip with a serger, zigzag, or overcasting stitch.
Follow the pattern instructions to sew front vest piece to side front vest piece, leaving an opening for the front pocket. Press the seam open.
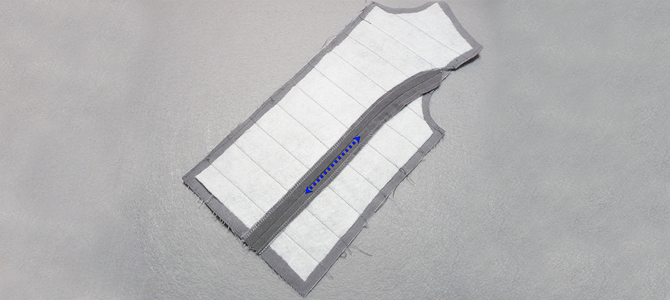
Working from the wrong side, mark the opening with long pins. Place the zipper over the opening with the top stop of the zipper lined up with the top opening and remaining length extending toward the bottom hem. Excess zipper gets trimmed later.
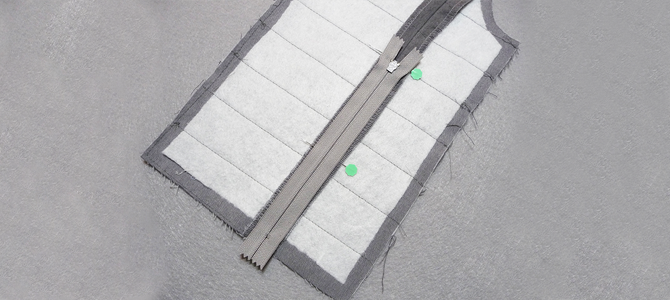
Thread a hand needle with contrasting thread. Hand-baste the zipper around the opening, stitching only through the zipper tape and seam allowance, basting close to the zipper teeth. Use pins as a guide for starting and stopping and remove pins when finished.
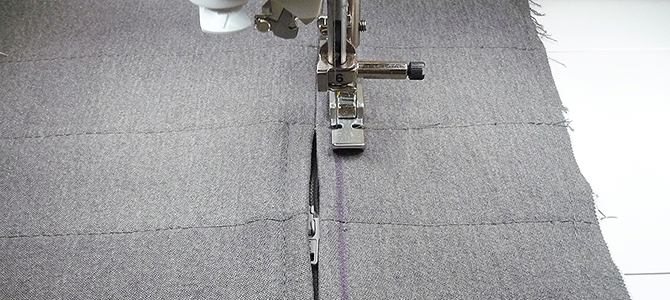
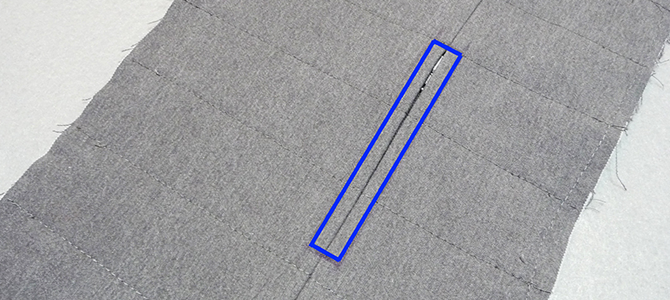
Use a washout marker and a ruler to mark a box for topstitching the zipper, with lines marked ¼-inch from the fold and stopping at the top and bottom pocket opening. See enhanced blue lines in the photo.
Attach the zipper foot to the machine. Working from the right side and stitching through all layers, stitch the first side of the zipper, stitching the side closest to the centre front of the vest, along with the top and bottom of the marked box. Leave the opposite side unstitched for now.
Tip: The SA208 zipper foot is very flat and narrow, making it easy to stitch this step and all remaining steps that require stitching close to the zipper.
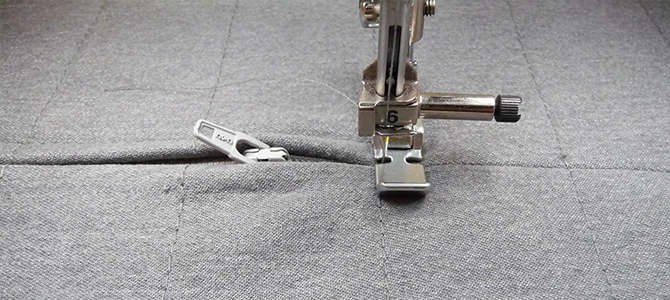
See the blue line showing the unstitched side of the zipper. Use the left or right side of the foot as necessary. A width setting of 0.0 is used for the left side of the foot and 7.0 for the right side. It’s very important to check your setting before stitching to make sure the needle clears the foot. If you are using SA161, the Brother adjustable zipper foot, simply slide the foot into the position you need to stitch close to the zipper.
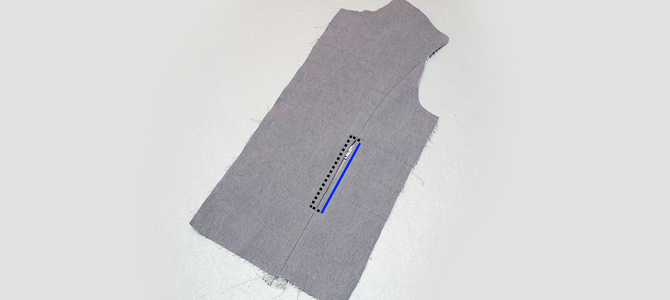
Select one of the pocket pieces. With the right of the pocket strip against the wrong side of the zipper, layer the first pocket piece to align with the seam allowance of the front vest piece, centering it over the partially stitched box.
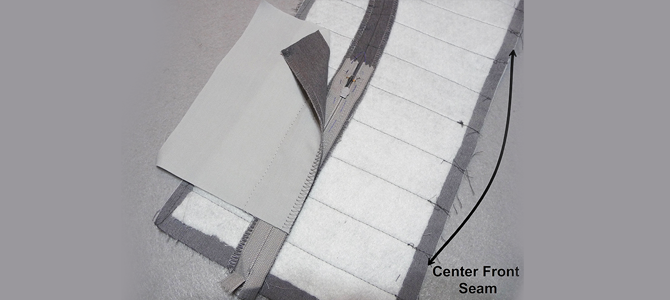
Pin layers together, placing a pin 5/8-inch from the top and bottom of each short end to leave the pocket seam allowance free. Push aside the front piece so you can stitch through just the pocket piece, zipper tape, and seam allowance.
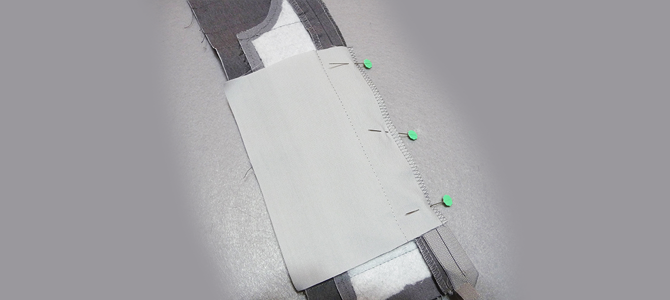
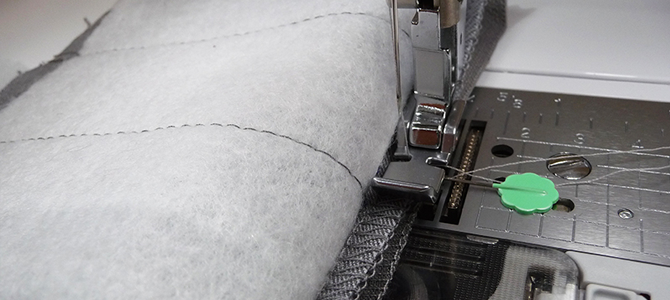
Working from the wrong side with the front vest piece facing you, stitch the pocket lining to the seam allowance of the front vest piece, beginning and ending stitching at the top and bottom pin and stitching as close to the zipper teeth as possible. The stitching line should be approximately ¼-inch from the edge.
Tip: Open the zipper part way to stitch without having the zipper tab interfere with stitching.
Press the pocket toward the centre front.
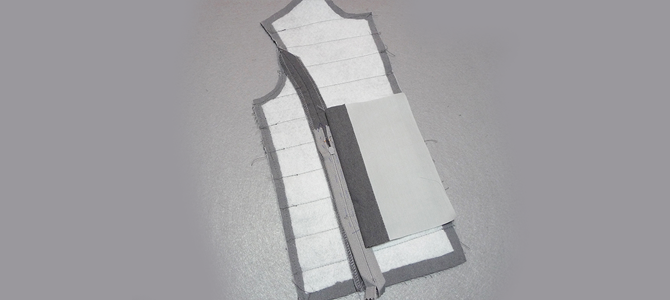
Next, layer the second pocket piece against the wrong side of the exposed zipper tape, aligning it with the seam allowance of the side front vest piece.
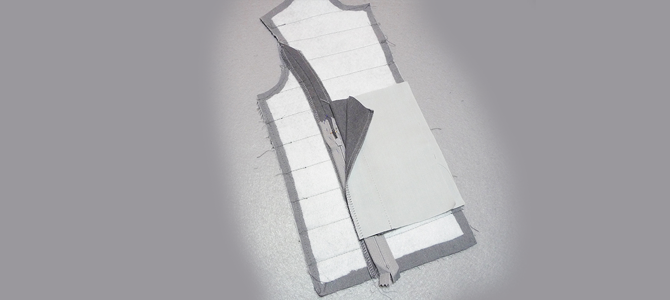
Once again, pin the layers together, placing a pin 5/8-inch from the top and bottom of each short end to leave the pocket seam allowance free.
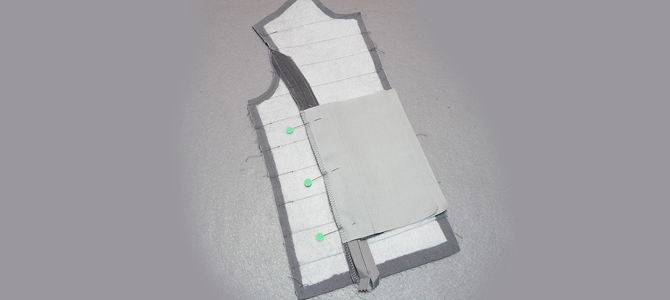
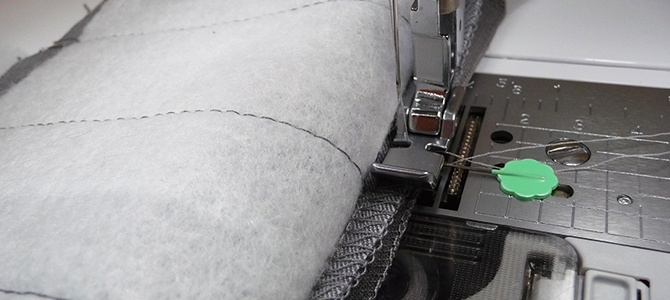
Push aside the side front piece so you can stitch through just the pocket piece, zipper tape, and seam allowance. Working with the side front vest piece facing you, stitch the pocket lining to the seam allowance, beginning and ending stitching at the top and bottom pin, and stitching as close to the zipper teeth as possible.
Remove the basting stitches. Flip and press so the right sides of the pocket pieces are facing. Trim the excess zipper below the lining.
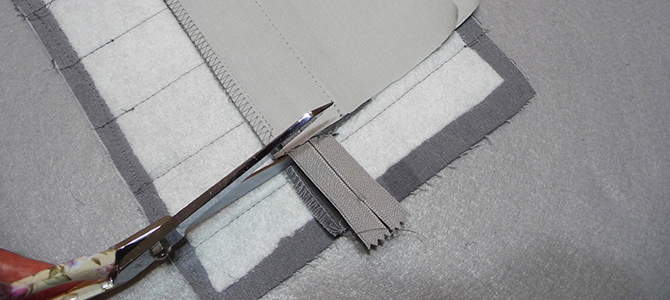
Trim the excess pocket lining so pocket edges are even at the centre front.
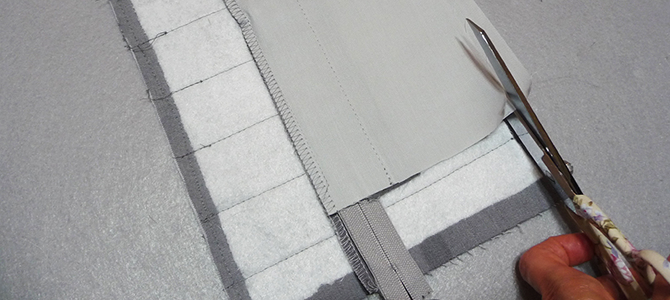
Pin the pocket layers together. Stitch a 5/8-inch pocket seam, pushing away the vest pieces, stitching only through the pocket layers and any exposed zipper tape. The zipper foot will help you get close to the point where the zipper is closed.
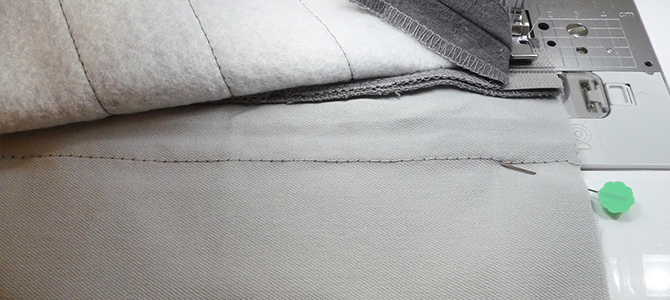
Working from the right side, topstitch the remaining side of the zipper, stitching the top and bottom of the marked box a second time to re-enforce the zippered opening.
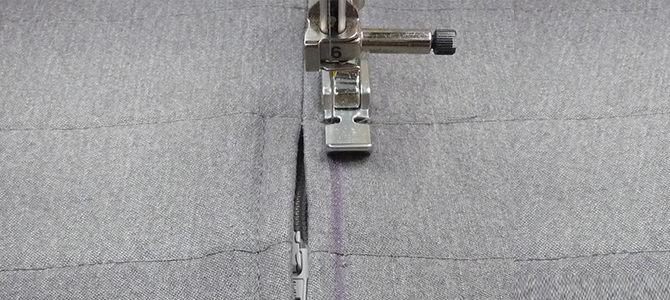
Switch to a standard presser foot and clean finish raw edges of the pocket with a zigzag stitch.
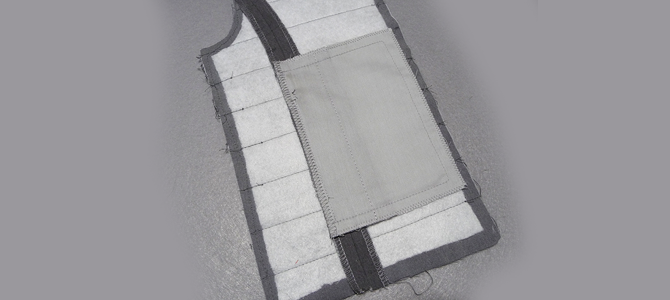
Complete the next pocket following each of the steps for two neatly finished zippered pockets.
If you want to add embroidery to the left chest it would be best to do it now, before the lining is in place.
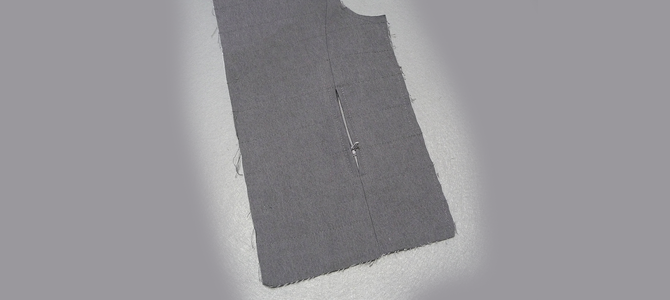
Complete the construction of the vest using the pattern instructions.
Tips for shortening the zipper:
To use this method, you will need the following supplies:
• A snipping tool to snip off excess teeth along with protective eyewear to wear during the process
• Seam sealant
• Hand needle and thread to make a bar tack, or button sewing foot and built-in machine stitch for sewing buttons
To shorten the zipper from the top, begin by marking one half of the separated zipper for the proper length, aligning the zipper with the starting and stopping point indicated in the pattern instructions. Mark the second half of the zipper to match. Use a tool to carefully remove excess plastic teeth leaving 5/8-inch of excess zipper tape above the marked lines. If tape frays, treat with seam sealant.
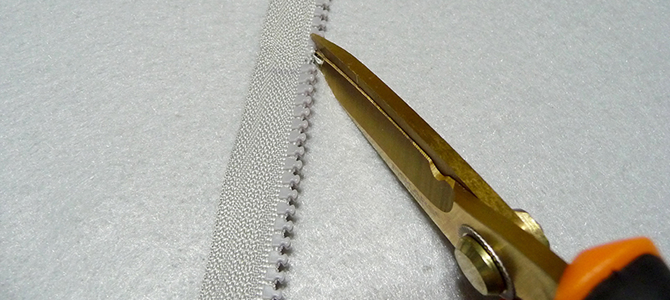
From this point on, you’ll want to make sure to keep the zipper tab well below the top of the zipper since you have removed the top stop.
To keep the zipper from sliding off at the top of the finished vest, you will need to stitch a heavy bar tack at the top edge. To sew the bar tack by machine, attach the button-sewing foot and select the button sewing stitch.
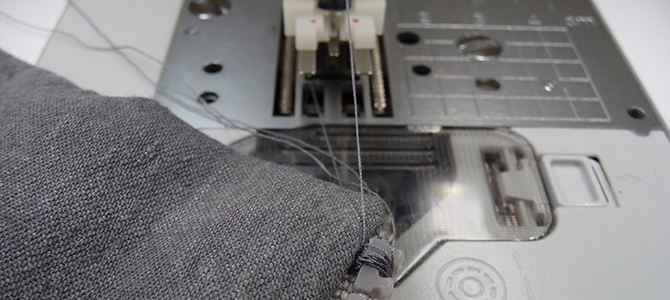
Position the foot so the stitch forms between the last two teeth at the top. Repeat the stitch three times for extra security.
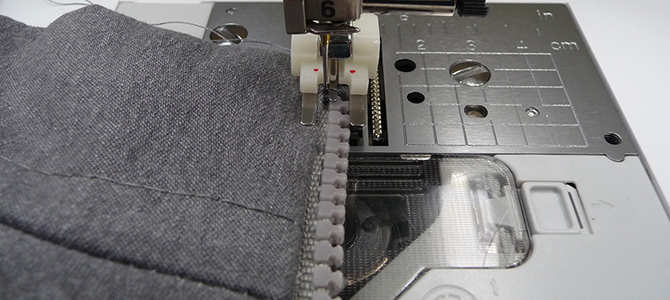
Treat the thread tails with seam sealant and trim when dry.
Now the vest is ready to wear! Whether it’s for you or someone else, enjoy the finished piece and take pride in the skills you’ve learned along the way.





Welcome to Brother Canada!
You're shopping from a location where delivery is currently unavailable (Nunavut, Northwest Territories, Yukon).
If you a shipping address in one of the provinces below, please select it to continue with your online purchase.
Otherwise, you can continue browsing to find a retailer, get info about Brother products, contact Customer Care and explore creative projects.
Bienvenue à Brother Canada!
Vous magasinez à partir d'un endroit à l'extérieur de notre territoire de livraison (Nunavut, Territoires du Nord-Ouest, Yukon).
Si votre adresse de livraison se trouve dans l'une des provinces suivantes, veuillez la sélectionner pour poursuivre vos achats en ligne.
Sinon, vous pouvez ignorer cette étape pour trouver un détaillant, vous renseigner sur les produits Brother, communiquer avec le Service à la clientèle et découvrir des projets de création.
 6-month extended warranty.



 6-month extended warranty.
 Your product has been added to your cart



 Your product has been added to your cart
Your product has been added to your cart
Thank you for registering your Brother product
Your product has been added to your cart
Your product has been added to your cart
Your product has been added to your cart
Thank you for registering your Brother product