Save $30 when you spend $150 or more on Supplies.



Add character to your bar cart with vintage finds and an easy DIY project to personalize your space.
Discover inspiring projects to create with your Brother machine. From cutting and crafting to sewing, embroidery, quilting, labelling and more, find new ways to bring your ideas to life.
1. Drinks: Stock your cart with 6–7 favourite spirits for a well-rounded selection. Pour them into vintage decanters with unique shapes and colours for a stylish look. Label the back or bottom of each decanter for easy identification, then arrange them from tallest to shortest on one side of the cart.
2. Plants: A small plant or fresh flowers brings the cart to life and makes the space feel polished and well styled. Place them on the opposite side of your decanters to create a sense of balance.
3. Citrus: Lemons and limes add colour, texture, and function to your bar cart. Display them in a glass or wooden bowl, placed in front of your plant for easy access and to create a balanced, layered arrangement.
4. Glassware: Vintage glassware adds character and is often more unique than modern retail finds. When shopping, keep in mind that different drinks call for different sizes and styles of glasses. Choose matching sets for a classic look or mix styles for a fun, eclectic feel. Display at least two types of glasses on the bottom shelf, with taller pieces in back and shorter ones in front.
5. Seltzer & Mixers: Keep your bar cart cohesive by choosing the same brand of seltzer and coordinating mixers when possible. Arrange them opposite your glassware on the bottom shelf. Use a cake stand or stack of vintage books to elevate the display, placing the seltzers on top and the mixers neatly in front.
6. Art: Finish your bar cart with framed art that complements your style and ties the look together. Mixing vintage and modern artwork creates a curated feel, while a playful quote or print adds personality and sparks conversation with guests. Looking for art ideas? Try our easy project below!
Now that your bart cart is styled, tap into your creativity with this easy step-by-step project to make a customized framed quote using the Brother ScanNCut DX.
Time to Complete: 2-3 hours
Skill Level: Beginner
Supplies & Tools:
Brother ScanNCut DX
Craft vinyl
5" x 7" floating frame
Textured or coloured cardstock paper

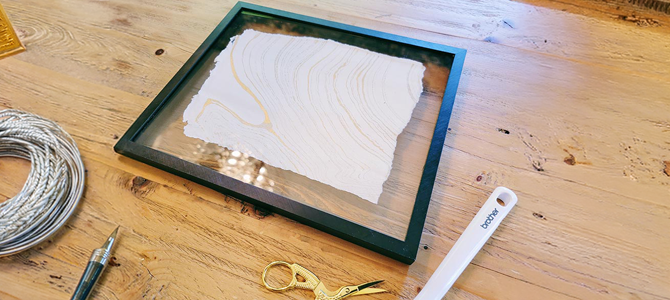
Open your frame, remove the placeholder print that came with it and save it for the next step.
Using the placeholder print as a template, tear your cardstock into a rectangle. It doesn’t have to be perfect. Place it between the 2 pieces of glass/acrylic and put the frame back together.
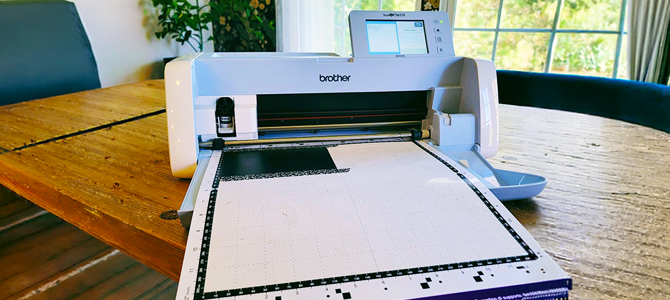
Attach removable vinyl to cutting mat with right side facing up. Transfer cutting file to your Brother ScanNCut. (Resize if desired.) Set your machine to half cut and cut out file.
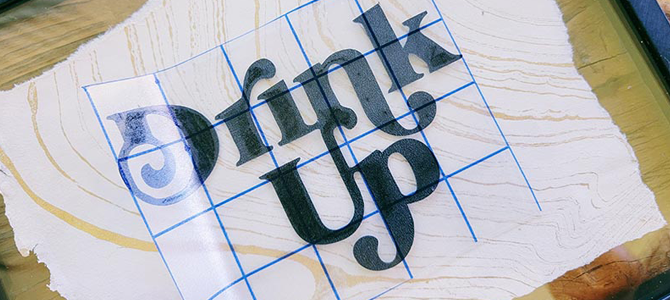
Remove excess vinyl to reveal words and transfer to transfer tape. Centre tape onto the centre of paper and adhere to glass.
That’s it! Now hang it on your wall or lean it on your bar cart. Bonus: Because the vinyl is removable, you can change the words any time.





Welcome to Brother Canada!
You're shopping from a location where delivery is currently unavailable (Nunavut, Northwest Territories, Yukon).
If you a shipping address in one of the provinces below, please select it to continue with your online purchase.
Otherwise, you can continue browsing to find a retailer, get info about Brother products, contact Customer Care and explore creative projects.
Bienvenue à Brother Canada!
Vous magasinez à partir d'un endroit à l'extérieur de notre territoire de livraison (Nunavut, Territoires du Nord-Ouest, Yukon).
Si votre adresse de livraison se trouve dans l'une des provinces suivantes, veuillez la sélectionner pour poursuivre vos achats en ligne.
Sinon, vous pouvez ignorer cette étape pour trouver un détaillant, vous renseigner sur les produits Brother, communiquer avec le Service à la clientèle et découvrir des projets de création.
 6-month extended warranty.



 6-month extended warranty.
 Your product has been added to your cart



 Your product has been added to your cart
Your product has been added to your cart
Thank you for registering your Brother product
Your product has been added to your cart
Your product has been added to your cart
Your product has been added to your cart
Thank you for registering your Brother product